


Here is a story of a miserable Victorian living room invigorated through traditional décor and restoration of period features. A customer of ours, Mrs E Page, Linslade Beds tells the story of her restored Victorian dining room:
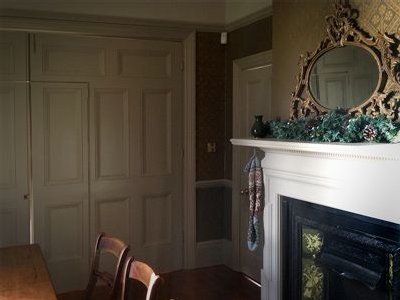
"Our Victorian living room had existed unloved for many years. We are still not sure how the previous owners used this room but with its very large panelled doors taking up most of one wall, and our plans to create a kitchen/diner out of the adjacent room with its bay window overlooking the lawn, it made sense to turn this rather neglected room into a dining room. We believe that the large dividing door could have been used originally for Victorian entertaining and this flexible system was designed to accommodate additional guests as extra space was needed. The doors were a great feature but the two spaces needed some planning to work together properly.
To start, our colour scheme had been roughly chosen. When we moved into the house the curtains in that room were so threadbare they would make a better Hawaiian grass skirt than a means to keep the drafts out - we had to replace them immediately. We chose a classic sumptuous curtain fabric with natural golds, greys and reds in the pattern that we thought would go with a general function of the reception room that we might choose in the future. At that stage, we were unsure about how we would remodel the house. We later fell in love with a grey and gold Historical Wallpaper called Triad originally designed by Augustus Pugin for the Palace of Westminster. The paper seems to work with the fabric, so that was it – colour scheme sorted. All we then needed to do was get specific with paint colours.

We decided to get all materials on site so that as soon as we needed something it was there. So we set about measuring up surface areas in order to determine numbers of rolls of wallpaper and sizes of pots of paint required. As all interior woodwork was already painted a dark brown colour, we decided it would be best to use a primer under our chosen paint in order to ensure a) that the paint would not chip and b) that we wouldn’t need more than 2 coats. We deliberated and deliberated about the ceiling colour and finally chickened out of using Lincrusta and a dark colour and chose to paint it white. For above the dado we chose Farrow and Ball Cornforth White and for the interior woodwork Hardwick White – all shades of grey to coordinate with the curtains and grey and gold wallpaper. For below the dado, we struggled to find the perfect colour and agreed to leave that issue until later as there was much work to get done before we had to cross that bridge. We choose a Lincrusta design for wallpaper below the dado which would then be painted. It had to be either Lincrusta or panelling for us, and so we went for the cheaper option that would still give us a 3-dimensional effect and enable us to keep the original skirting and dado rail.
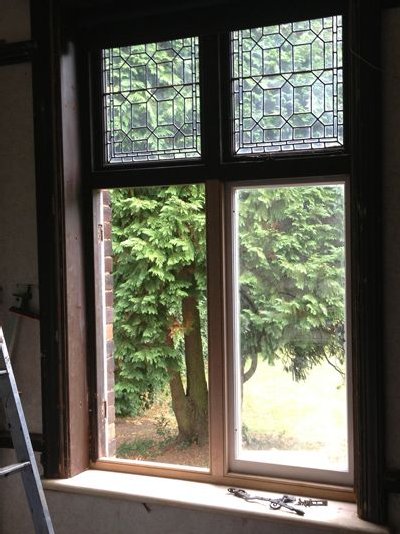
We found when we had reviewed the state of all of our windows and doors in the house a couple of years earlier that whilst our period leaded windows were generally in good condition, the bottom of one of the windows on the south side of this room was beyond repair and so we commissioned a replacement part to be made.
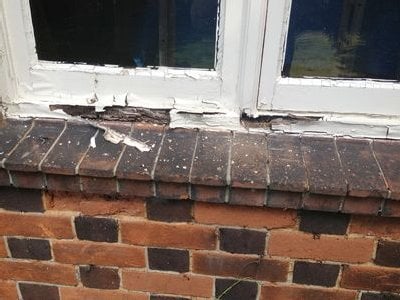
Now onto the work: we started by emptying the room. We then removed all ironmongery from windows and doors. Once the room was empty we needed to fit the replacement window parts we had commissioned a year previously but had not fitted due to the mess it would make in a room we were still inhabiting. We had it made at the same time as 8 other windows that were being fabricated for our garage and annexe. Ordering a large batch of windows at the same time makes sense financially – it gives you more scope for negotiation on price and timescales with the joinery than feeding them a window here and a window there as piecemeal work. These may take ages to come as they will be fitted around the larger, more lucrative projects. It also saves the supplier on delivery costs and site visits. Fitting the window was a fiddle and had to be done on a fair day and at the weekend when we could work from early in the morning till late at night if need be in order to ensure the house was secured before bed. Once the window had been fitted and fixed into place, there was a lot of remedial work required on the wall surrounding the window where the plaster had been damaged and or had crumbled due to all the banging around to get the window in place.
We needed to strip off all the wallpaper on the walls and ceiling and take the room back to its raw state and inspect all surfaces so that any remedial works could be done all in one go. When we had the whole house rewired 2 years ago, some very poor plastering had been carried out by the electricians resulting in large uneven areas on the walls around light sockets and wiring. A small bucket of plaster was required to fill around the window. Once dry, we needed to skim other areas of uneven wall and ceiling to create flat surfaces.
We sanded and repaired the woodwork in the room; some of the wood was rotten and elements needed remaking which required sourcing wood of a similar age so as to give a consistent finish. The sanding was a mammoth and very messy job due to the large complicated windows with leaded panes, as well as the usual dado, picture rail mouldings, skirting board, door, door frame, wooden fireplace as well as large 4 metre by 2-metre panelled doors.
These large panelled doors had given us a dilemma. Whilst attractive, they were not very practical as to leave them open blocked doorways into the two reception rooms they joined. It took us two years of living in the house to come up with a solution – to cut smaller doors into the large doors so that there was direct access between the two rooms without blocking the two doorways and yet allowing us to easily open them. This was our next task – to cut the small doors out of the large doors.
These small doors were cut, hinged and trimmed with mouldings to give a neat period finish to the raw edges. Of course, this task also involved more planning, sanding, filling etc
After an extremely good hoover and dust of all surfaces, we were ready to start painting. We started with the ceiling in white with a Crack Free Ceilings paint, that aids a flexible and smooth finish on newly filled or plastered surfaces, then above the picture rail in Cornforth White, all woodwork in Farrow and Ball Medium Undercoat and then two coats of Hardwick White, with a light sand in between coats. We chose an ornate ceiling rose for our ceiling and fixed it in place with universal bonding adhesive after adjusting the position of the wiring to ensure that our chandelier would hang bang in the middle of our dining room table. We then applied our Triad wallpaper between the picture rail and the dado rail. This proved tricky as we found the number of square metres we had measured, although far less than the square meterage of the wallpaper we had purchased, with the pattern repeat taken into account, far more than you would have thought necessary was required. With some painstaking fiddling and making sure that we started the pattern in the centre of the chimney-breast to give a good finish, we managed to make the 3 rolls stretch to the whole area required.
We used the Lincrusta below the dado rail. This was at first tricky to apply but like with all jobs, once we got the hang of it and took our time cutting the pieces to the required size, soaking them in the bath and then applying them with Lincrusta adhesive, it was more than manageable. Once the Lincrusta application was complete we need to give it a coat of white spirit and allow to dry.
Although not confident with our colour choice, we, first of all, painted the Lincrusta in what we believed was the closest to what we were looking for from the Farrow and Ball range – a very dark grey called Downpipe. We found that much to our frustration, we ended up with a blue bias on the wall rather than a more earthy grey wall although Downpipe seemed to be the colour to match the wallpaper. At that point, we were very unsure how to achieve the finish we needed to achieve as the gold wallpaper was reflecting the light and making it appear a green/yellow-grey. No paint colour on any swatch by any manufacturer seemed to exist that was the midpoint between the grey and the gold of our Triad wallpaper but in a darker shade and continuing our progression from lightest to darkest shade of the same hue.
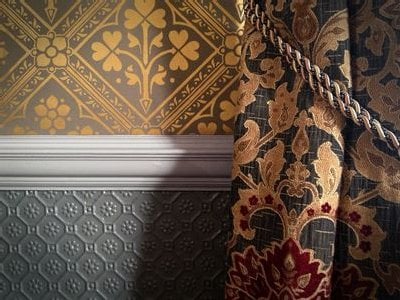
After some research, we decided to create our own bespoke colour. Once applied this just looked “right”. Just in time – by this stage, it was 4 days before Christmas.

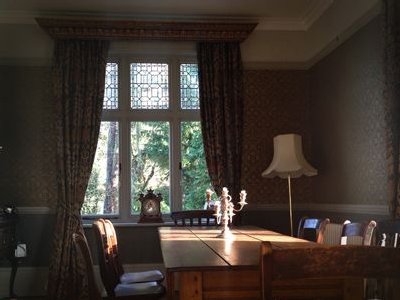
Our finishing touches included a period brass dimmer switch, an antique gilded mirror and some ornate gilded curtain pelmets. We eagerly await delivery of our bespoke Bohemian crystal chandelier from the Czech Republic. All in all our Victorian dining room has been worth the three years in planning and has seen many excuses for celebration in its existence of merely a few weeks. Our house was happy to say goodbye to that depressing Victorian Living Room of yesteryear which was a stranger to laughter and lightheartedness."
What is my favourite finishing touch in the living room?
It is definitely the 5 candle silver plated pair of candelabras which are lit for all our meals at the weekend, which makes them really special.
Be the first to add a comment...