


Panelling really consists of a series of rectangles or squares set back into a wooden frame.
What tools and supplies do I need to make reproduction wood panelling?
To make your solid wood panelling you will need the following:
- Flat sheets of plywood
- Planks of redwood/pine for the outside frame of your panelling and the vertical struts that separate each panel – these could be anywhere around 1.5-2cm thick and 6-10cm wide, depending on the size of your desired panelling and indeed the dimensions of your room.
- Edging/beading to go around the inside edge of each panelled rectangle
- Skirting board to finish off the bottom of the panelling
- Dado rail to finish off the top of the panelling (assumes the panelling finishes at waist height and is not floor to ceiling)
- Polyeurethane wood adhesive
- Panel pins
- Sandpaper
- Paint
This list assumes your panelling will be painted rather than left as bare wood. If you wish to create wood panelling, the above list need to be of solid wood all of the same type and hue.
Making panelling step by step
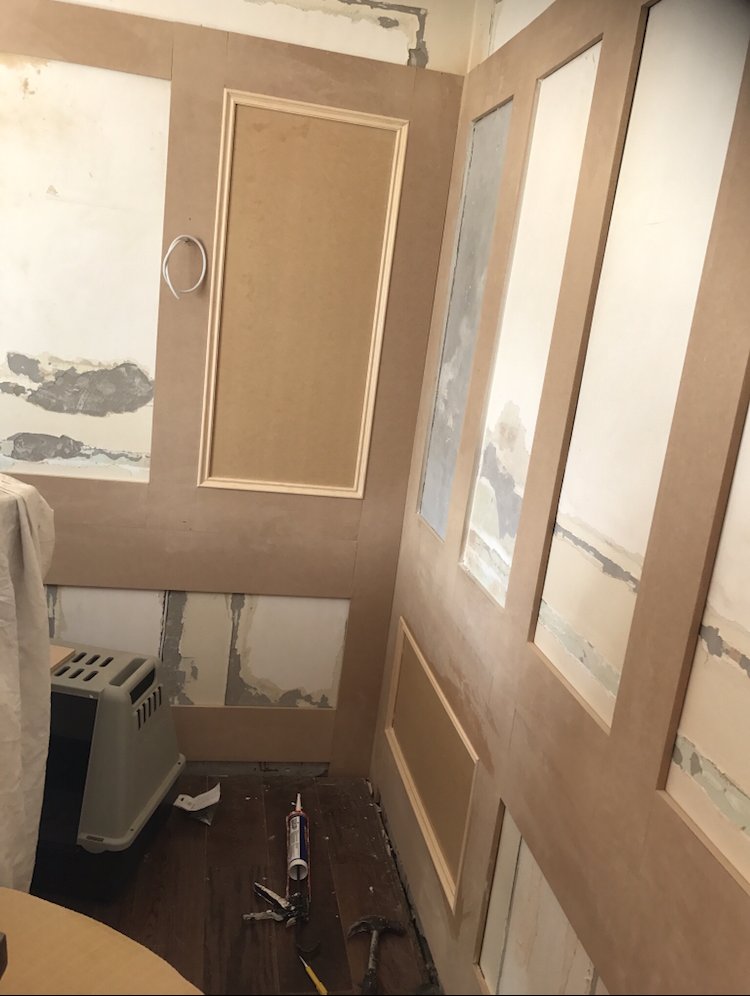
Photo courtesy of Joanne Tams
- First of all you need to measure your wall onto which you are adhering the panelling. Let’s assume for this exercise that this wall is 4 metres long = 400cm.
- You then need to decide approximately how wide you wish each panel to be – let’s assume you wish this to be approx 25cm
- You also need to know how wide your planks between the panels are – let’s say ours are 7cm.
- So within your 400cm space your sequence will be as follows:
- Plank, rectangle, plank, rectangle, plank, rectangle, plank, rectangle, plank, rectangle, plank, rectangle, plank, rectangle, plank, rectangle, plank, rectangle, plank, rectangle, plank, rectangle, plank, rectangle, plank (you always need to start and end with a plank). If your total does not add up to exactly to your wall length, in this case 400cm, you’ll need to adjust the width of your rectangle to accommodate your wall length so as not to end the panels awkwardly. Our total adds up to 391cm, so we need to increase the size of our rectangle to 25.75 to achieve a total of 400cm with 12 rectangles (309cm) and 13 planks (91cm).
- Now you’ve done the planning, you can start work. Decide on the height of your panelling. Then cut your plywood to size (you will need two 8x4 sheets in our example) and stick to the surface of your wall from the floor up to this height. For extra rigidity you may wish to batten out your wall at the back behind the plywood.
- Next line up your skirting against the plywood panels on the wall and draw a line along the plywood so you know where your skirting starts. After cutting your planks to the width and height of your panelling, glue and pin your planks around the top, the sides and the bottom of your panel above the skirting level so that the skirting area is left free.
- Now cut your planks to the length measured vertically from the bottom of the top plank to the top of the bottom plank. In our example you’ll need 11 of these planks. Then pin and glue the rest of your planks vertically onto your panels leaving gaps of 25.75cm between them.
- Once this is dry and well fixed into place, cut up your edging to line the inside of the rectangles with 45 degree cuts on the corners. Pin and glue this into place.
- Next fix your skirting in place below the panels and your dado in place above the panels.
- Sand off any rough edges and paint in your colour of choice.
The effort of creating this bespoke wood panelling is no doubt greater than using an MDF wall panelling kit and is a better solution where your panelling has to fit in with other elements of the room, is replacing damaged panelling or will be put into a room with awkward dimensions. However that if you can make an MDF wall panelling kit, with it's various options in terms of panel sizes and heights, work in your room, this will save you time and money. This of course does not negate some of the steps above as you will still require dado and skirting to complete the job.
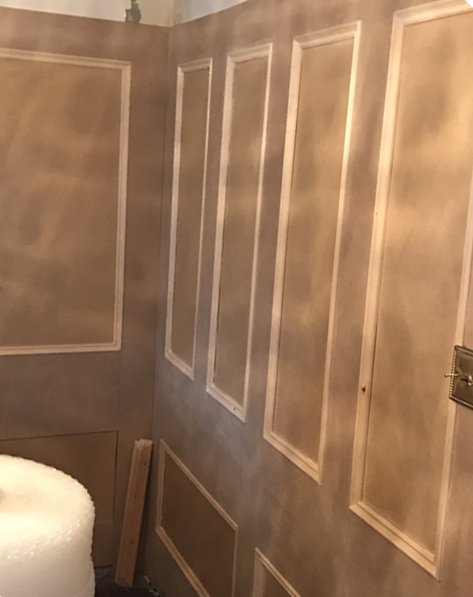
Photos courtesy of Joanne Tams
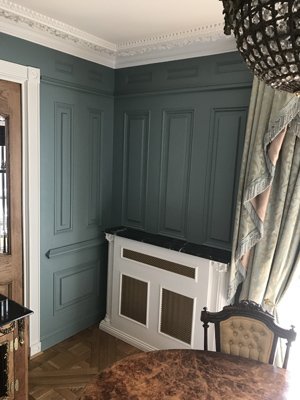
How should I decorate reproduction wood panelling?
If you are trying to create the impression of panelling that is old it will need several coats of paint to try to achieve this. Your new panelling is likely to have sharp edges and perfectly straight lines which would be unusual for genuinely old panelling. So this can be made less obvious if you soften these lines with 4 or 5 even coats of thick good quality paint. Choose a satin paint in a Victorian or heritage colour pallet by a good quality manufacturer such as Farrow and Ball. A white or off white colour, or a dark colour such as navy blue or dark grey are very traditional colours that will help disguise the fact that your panelling is brand new. Coordinate these with the rest of the colour scheme in your room for curtains, rugs, ceilings and flooring.
Posted by c_pezaro - May 14, 2020 - 08:12
Hi do you have any information on constructing the design in the last photo. Or even an enlarged picture for me to follow. Thanks