


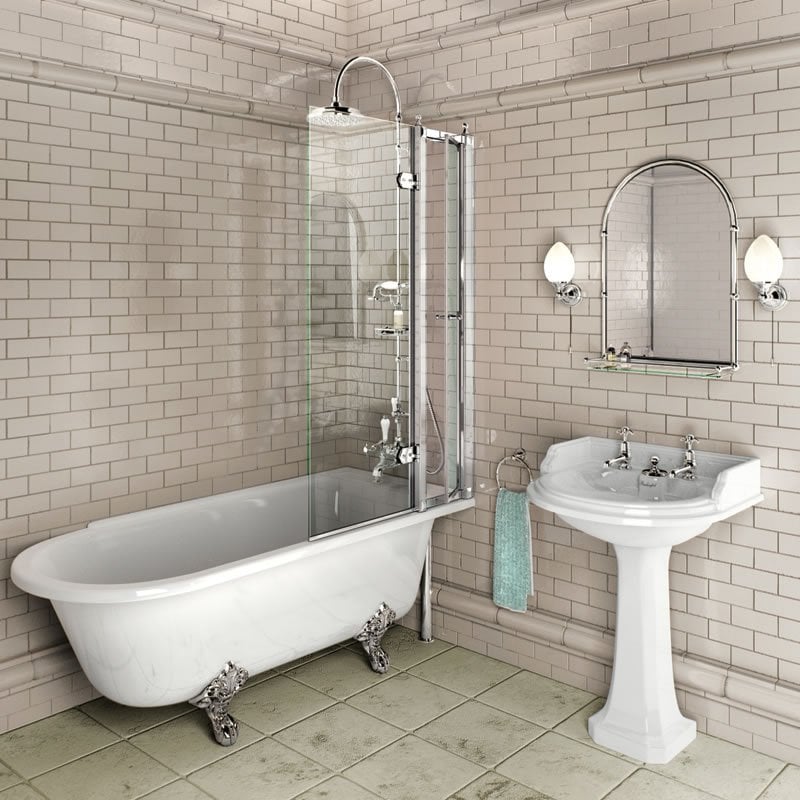
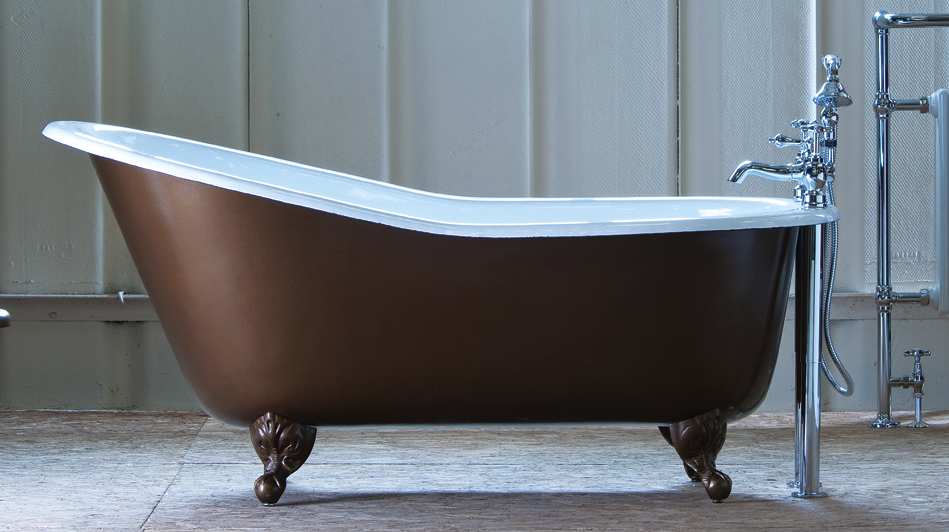
The bath really is the stand out feature of most bathrooms and a roll top bath is the perfect choice for a period bathroom. There are a lot of different shapes to a roll top bath. For example there is the slipper bath with one high end, the oval bath with both ends at equal heights, the bath that is flat at one end or on one side and therefore supposed to be positioned against one wall.
Are roll top baths comfortable?
This is a really important question. After all, if a roll top bath isn't comfortable, why would you choose it for your bathroom? Other than obviously it looks nice. The answer is yes, roll top baths are very comfortable. They are usually deep so you can immerse your whole body in the bath. The top is rounded so you can comfortably rest your head on the edge of the bath. The only slight drawback is that being deep and slidy, they could pose a drowning risk for small children left unaccompanied in the bath if it is filled to at least half way.
Choosing a bath
The first thing to determine when choosing a rolltop bath is the layout of your bathroom and where you would like to place the bath. This will then narrow down your choice of styles as you may choose a bath that is flat on one side and butts up against the wall; or if it’s going to be away from any walls, you may well want a slipper or fully roll top bath which is oval all around. The type of bath and positioning will also determine which type of taps you use. If the bath is not near any wall you will need either deck mounted or floor mounted taps. Deck mounted taps are mounted on the edge of the bath and the bath needs the relevant holes drilled to accommodate this – this should be done by the factory, and not by you ideally.
If the end of the bath is flat, this is where the taps will be located. If the bath is double ended, the taps would be positioned in the centre.
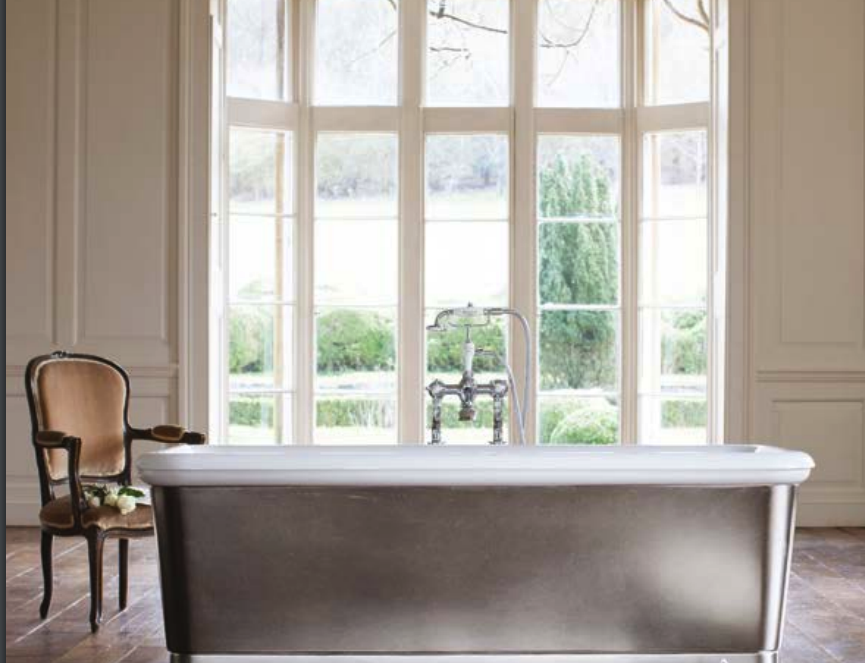
Also what colour do you want the bath to be? Do you want it painted in a colour of your choice or do you want a white bath? You can have a white enamel interior or a painted interior. You can have an enamel or painted exterior that is not necessarily the same as the interior. You may want a copper or nickel interior or exterior to the bath which is also possible on some models.
Plumbing and fittings
Once you know the location of your bath, you can put all your plumbing in place such as waste and p traps in that go behind and underneath the bath. Follow the manufacturers instructions for this and make sure your pipes line up with the outlets on the bath.
Once the first fix plumbing has been done and hot and cold taps have been located, you need to decide what sort of tap fitting you will have ie a deck mounted which sits on the bath itself or wall mounted or floor mounted that goes over the side of the bath. You may also choose to have a shower going over the bath – with a fixed rose that has been fixed to a wall and flows over and into the bath, or a telephone style hand-held shower rose.
Once everything is fixed in place, you could also may choose to have a shower curtain rail in an oval or circular shape. Your shower curtain will hang from this and will ensure that water does not go all over the floor when you have a shower in your roll top bath.
Choosing accessories for your bath
Taps are very important as they are what you touch every time you use your bath so you want these to be robust and of good quality. Copper taps are very beautiful but will tarnish however this aging process adds to the appeal for some giving your bathroom the true period look. Chrome taps are the usual choice but to make these different, you can choose black indices or handles to create an art deco feel.
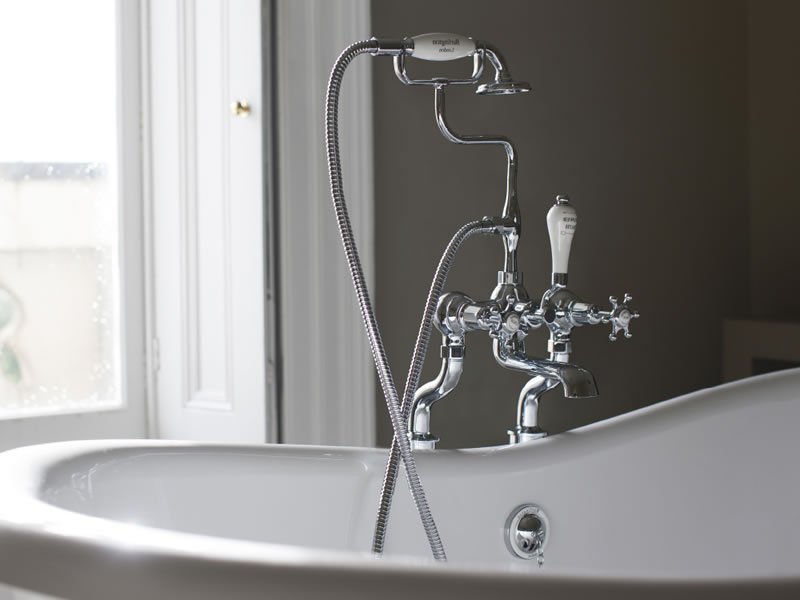
Plugs can be chosen in the simple traditional style or with a click clack waste. The bath waste can also be chosen in a choice of chrome, nickel or copper to match the above.
Choose the position of your bath
In most bathrooms there will be an obvious location where the bath will fit best. However if your bathroom is vast you will have a choice and could even position it in the centre of the room facing out at a nice view or in front of a fireplace for real decadence.
If you are choosing a bath which will be positioned against a wall, all tiling, grouting and sealing must be completed before the bath is fitted to the wall.
How to install your roll top bath
Here is a general installation guide for all baths. You need to check this will work with your particular bath and always follow the manufacturers instructions. It is key that prior to installation you check that all parts have been supplied – these should be listed on the manufacturers paperwork.
Tools needed
The tools you will need are a screwdriver, a spirit level, a spanner, a drill, a pencil and a tape measure. It also helps to have a level floor in your bathroom as any slight slant will be obvious once there is water in the bath.
Step one
Assemble the bath on a mat to protect against damage to the bath surface. If it is a heavy bath it may require two people to lift it.
Step two
Drill 4 holes in the floor and install the bath feet making sure you have located the feet in the correct location for the bath to fit on top and taking into account where the plumbing lines up with the plug hole and bath overflow. You need to make sure that the location of your taps is also aligned with the hot and cold water that will be coming into the bathroom. Always remember that the hot tap is on the left and the cold is on the right.
Step three
Once the bath is in the general position ready to be plumbed in, we suggest fitting the waste and overflow to the bath. Before you do this you can if you wish smear silicone sealant around the inside of the overflow and waste to ensure a totally water tight seal. To produce a perfect silicone sealant line the area must be dust free and cleaned with a degreaser such as methylated spirits to ensure good adhesion of the silicone. Use waterproof mould resistant bathroom silicone sealant (not acrylic it does not adhere as well)
Step four
Mask with making tape both sides of the join leaving a reasonable space for the silicone to fill. Apply the silicone sealant, then you can wipe the silicone back and forth with your finger, forcing the sealant into the small gaps and crevices as you go. Ensure the silicone is thin where it meets the masking tape. Then remove the making tape to reveal a perfect line that provides a perfect seal.
Step five
Put the bath onto the feet and fix in place again following the manufacturers instructions. Once the bath is fixed securely in place, install your chosen taps in their chosen location.
Step six
Every bath requires an overflow to protect your house from those senior moments!
The Victorian Emporium offers a host of luxurious, traditional bath tubs and accessories. Take a look at our bathroom furniture and accessories and discover the full range.
Posted by kimmy Kervel - Dec 31, 2020 - 11:41
Thanks for sharing this precious information with us… this is really helpful for me and also for my upcoming project as well